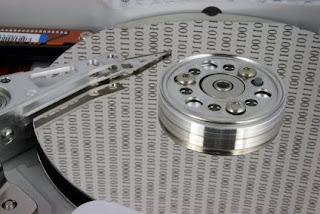
Although not as frequently as before, the file system and sector errors sometimes occur. Error can be caused by hardware problems, power failures or even a software error. Usually Windows 7 recognize hard disk problems and automatically schedule a disk check when the computer restarts.
However, if including a proactive person, you may want to monitor their own health status of your hard drive rather than wait for Windows 7 to recognize the problem. If so, you may be pleased to know that can use the Check Disk to analyze the hard drive every time. If it found a problem, you can use Check Disk to fix the problem.
Running Check Disk
While checking the disk is essentially a command line tool, you do not have to open a command prompt to run it. In fact, you can run it from the computer. After the computer is open, simply right-click the hard drive that put before and select Properties. When the Properties dialog box appears, select the Tools tab. Furthermore, the panel Error-checking, click check now.
When User Account Control (UAC) appears, click Yes. After the UAC closing, you will see a dialog box check the disk. Usually, we check the Automatically fix file system errors and Scan for and attempt recovery of bad sectors and click Start. Windows 7 will schedule Check Disk to run at start-up and ask you to restart. Check Disk will fix the problems found. However, to run Check Disk in analysis mode, we need to use a combination of other settings.
Performing Basic Analysis
If you want to see your hard drive quickly circumstances, clear the check mark on both the Check Disk option and click Start. By doing so, Check Disk runs relatively fast and in read-only mode. Once completed, you will see a status message that tells what happens at each stage of the process and of course, a progress bar showing how long the process will continues.
When the process is complete, you will see a dialog box that contains a summary of the process. However, if you click the arrow See details, you'll see a fairly detailed report. As you can see, the process of checking the hard drive through three stages. In addition to displaying the report on screen, Check Disk also save the report in the Application log with the code of Chkdsk and Event ID 26212. Event log contains all statements and details of changes made Check Disk.
Conducting Thorough Analysis
If you want to do a more thorough analysis of the hard disk, remove the check mark in the box Automatically fix file system errors and check the Scan for and attempt recovery of bad sectors and click Start. Checking process will be run in read-only mode which means that Check Disk only will examine and identify bad sectors, will not try to recover them.
After the operation is complete, Check Disk will save the report in the Application Log and display the report in the dialog box. As you can see, when doing a thorough analysis, Check Disk will perform the four stages of the examination.
Stages of Check Disk.
When you run Check Disk in fix mode and recovery, he made the five-stage process (the three main phases and two additional stages). However, when you run the basic analysis, Check Disk only runs three major stages. When you run a thorough analysis, Check Disk only runs three main stages and an additional second stage.
Phase 1: Check Disk checks each segment of data files in the Master File Table (MFT), which shows every file and directory on the volume. Phase 2: Check Disk to check the consistency of each index (directory) on the volume and verify every file and directory represented by the data file in the MFT. Check Disk also ensure that every file or subdirectory in each directory has the appropriate file data segment in the MFT. Check Disk then ensure that time and file size are in accordance with the list of available files. Stage 3: Check Disk examine every information security of each file and directory on the volume by verifying that each security information structure consistent. Stage 4 (optional): Check Disk verifies all clusters in use. Stage 4 is only executed when you select the Automatically fix file system errors. Stage 5 (optional): Check Disk verifies unused clusters. Stage 5 is run when you select Scan for and attempt recovery of bad sectors.


No comments:
Post a Comment